Pokémon mini Development Documentation
PokeCard 512
Designed by Lupin, the PokeCard 512 was a series of three flash cards originally based on JustBurn’s flash cart.
There was never a shell specifically made for this, but rev 2+ should fit in Ksanto’s with some modification to the bottom shell. Version 1 does not need a shell and might not even work with one.
There were a few label designs for this:
- Lupin’s design for v1: with shadow on Pikachu, without, and as SVG
- JustBurn’s design for rev 2
- Palkone’s designs for rev 2.1: Dewgong White, Rhyhorn Grey, Wooper Blue, Chikorita Green, Smoochum Purple
- A full-color design based on these by someone else, maybe me (YasaSheep), I don’t remember. It’s not in Palkone’s thread so uh


PokeCard 512 rev 2.1
Sold for €35 for just the cart and €55 for the linker.
Features
- Capacity: 512 KiB, capable of storing 1 commercial game
- Multicart support (for homebrew only)
- Fits in an official case with some modification
- Requires a hole in the top for the connector and a cutout in the back for the flash memory chip
- Software can write to the cart from within the PM
Issues / limitations
- Must be used in a case, board will not make contact loose
Technical specifications
- Size: 512 KiB
- Flashing speeds: ~10s
- Flash memory: SST39VF040
- Bridge: XC9572XL-10VQ64C
Pins are the same as the PokeCard 512 rev 2
Differences from rev 2
- The CPLD (bridge chip) is rotated with a different pin layout for PCB routing reasons
- Card layout has a mounting position for both the old/long flash and new/short flash package
- The programming connector now protrudes from the card
- Debug pins on the back of the card for easier manufacturing / programming of CPLD
- Slightly reduced component count on flasher cable, some layout optimizations (e.g. all small components are on the bottom now, only the USB connector and IC are on the top)
PokeCard 512 rev 2.1 flasher
Connects to the PC with a USB 2.0 Mini-B cable. This should support rev 2.0 cards, but have not tested it personally.
Use PokeFlash GUI to flash with this. It can also craft multicarts for you.
Technical specifications
- Chip: FT2232HL
- 6-pin JST SH-style female cable
- The single-head one, and note that SH-style means 1.0mm pitch.
Pins
TODO: confirm..somehow, TMS/TDO don’t seem right
| Pin # | Name | Description |
|---|---|---|
| 1 | GND | Ground |
| 2 | TMS | |
| 3 | TDO | |
| 4 | TDI | |
| 5 | TCK | |
| 6 | VCC | 3.3V in |
PokeCard 512 rev 2
Despite both being considered rev 2, there were two versions of this card. The differentiator is the code flashed onto the CPLD, which was updated on carts created after 2011-04-17.
The CPLD of the early versions can be updated by following the steps here. This will allow multicart functionality.
Features
- Capacity: 512 KiB, capable of storing 1 commercial game
- Multicart support (for homebrew only) for carts shipped after 2011-04-17 or which have had their CPLD updated
- Fits in an official case with some modification
- Requires a cutout in the back for the flash memory chip
- Software can write to the cart from within the PM
Issues / limitations
- Must be used in a case, board will not make contact loose
Technical specifications
- Size: 512 KiB
- Flashing speeds: ~10s
- Flash memory: SST39VF040
- Bridge: XC9572XL-10VQ64C
Pins
| Pin # | Name | Description |
|---|---|---|
| 1 | GND | Ground |
| 2 | PG_SDO | Programming serial data out |
| 3 | PG_ON | Programming on? |
| 4 | PG_SDI | Programming serial data in |
| 5 | PG_CLK | Programming clock |
| 6 | VCC | 3.3V in |
PokeCard 512 rev 2 flasher
Connects to the PC with a USB 2.0 Mini-B cable. This should support rev 2.1 cards, but have not tested it personally.
Use PokeFlash GUI to flash with this. It can also craft multicarts for you.
Technical specifications
- Chip: FT2232HL
- Cable:
- Cart-side: 6-pin JST SH-style female cable
- The single-head one, and note that SH-style means 1.0mm pitch.
- Flasher-side: 8-pin JST SH-style female connector
- You can get a single-head cable and shorten+connect the wires together with the above cable
- This is only on some units, others have the wires directly soldered to the board like the rev 2.1 flasher
- Cart-side: 6-pin JST SH-style female cable
Pins
TODO: confirm..somehow, TMS/TDO don’t seem right. They’re twisted in Mr.Blinky’s picture but not on Agilo’s soldered-in version of the linker, and I’m expecting TDO should go to PG_SDO
| Pin # | Name | Description |
|---|---|---|
| 1 | GND | Ground |
| 2 | RST | Unconnected |
| 3 | TRST | Unconnected |
| 4 | TMS | |
| 5 | TDO | |
| 6 | TDI | |
| 7 | TCK | |
| 8 | VCC | 3.3V in |
Reprograming the CPLD using JTAG
You probably need the rev 2 flasher to update the CPLD, it’s unknown if rev 2.1’s works.
If you have a rev 2 flasher with the 8-pin header or want to add it yourself, you can grab the 8-pin cable above or otherwise grab a 6-pin JST SH-style breakout board that you can plug the existing cable into.
- Solder one wire to the GND pin and one to the VCC pin of the cart-side JST SH-style header
- Solder one wire to each of the three pads on the back of the cart. Top to bottom these are TCK, TMS, and TDI
- Carefully solder one wire to the 5th pin down from the top-left of the CPLD
- Assuming the breakout board version, count the pins from the black wire (= pin 1, GND) and solder the wires into place: GND, TMS, TDO, TDI, TCK, VCC (TODO: confirm TMS/TDO)
Now connect the flasher to your PC as normal and use Lupin’s TestSuite to flash prog.svf from this zip.
PokeCard 512
We informally refer to this as rev 1, but it wasn’t labeled as such on the cartridge. This is more or less a recreation of JustBurn’s flash cart with some small adjustments.
Unlike its successors, these had to be programmed from the regular cartridge pins, requiring an official Pokémon mini connector ripped from the console.
This can be programmed by the PokeCard 512 flasher or a PokeUSB
Features
- Capacity: 512 KiB, capable of storing 1 commercial game
- Can be used without a shell
Issues / limitations
- No multicart support
- Cannot fit in an official case at all
- Extends past the top of the console
Technical specifications
- Size: 512 KiB
- Theoretical flashing speeds: 30~50 μs per byte, so ~16~26s for 512 KiB
- Flash memory: AT46LV040-90TC
- Bridge chip: XC9536XL-10VQG44C
PokeCard 512 flasher
This flasher requires an official PM cartridge connector, but was sold with them already attached. As such, it’s capable of dumping official cartridges. It’s possible this is an early version of PokeUSB.
Use PokeUSB on Windows XP to flash with this.
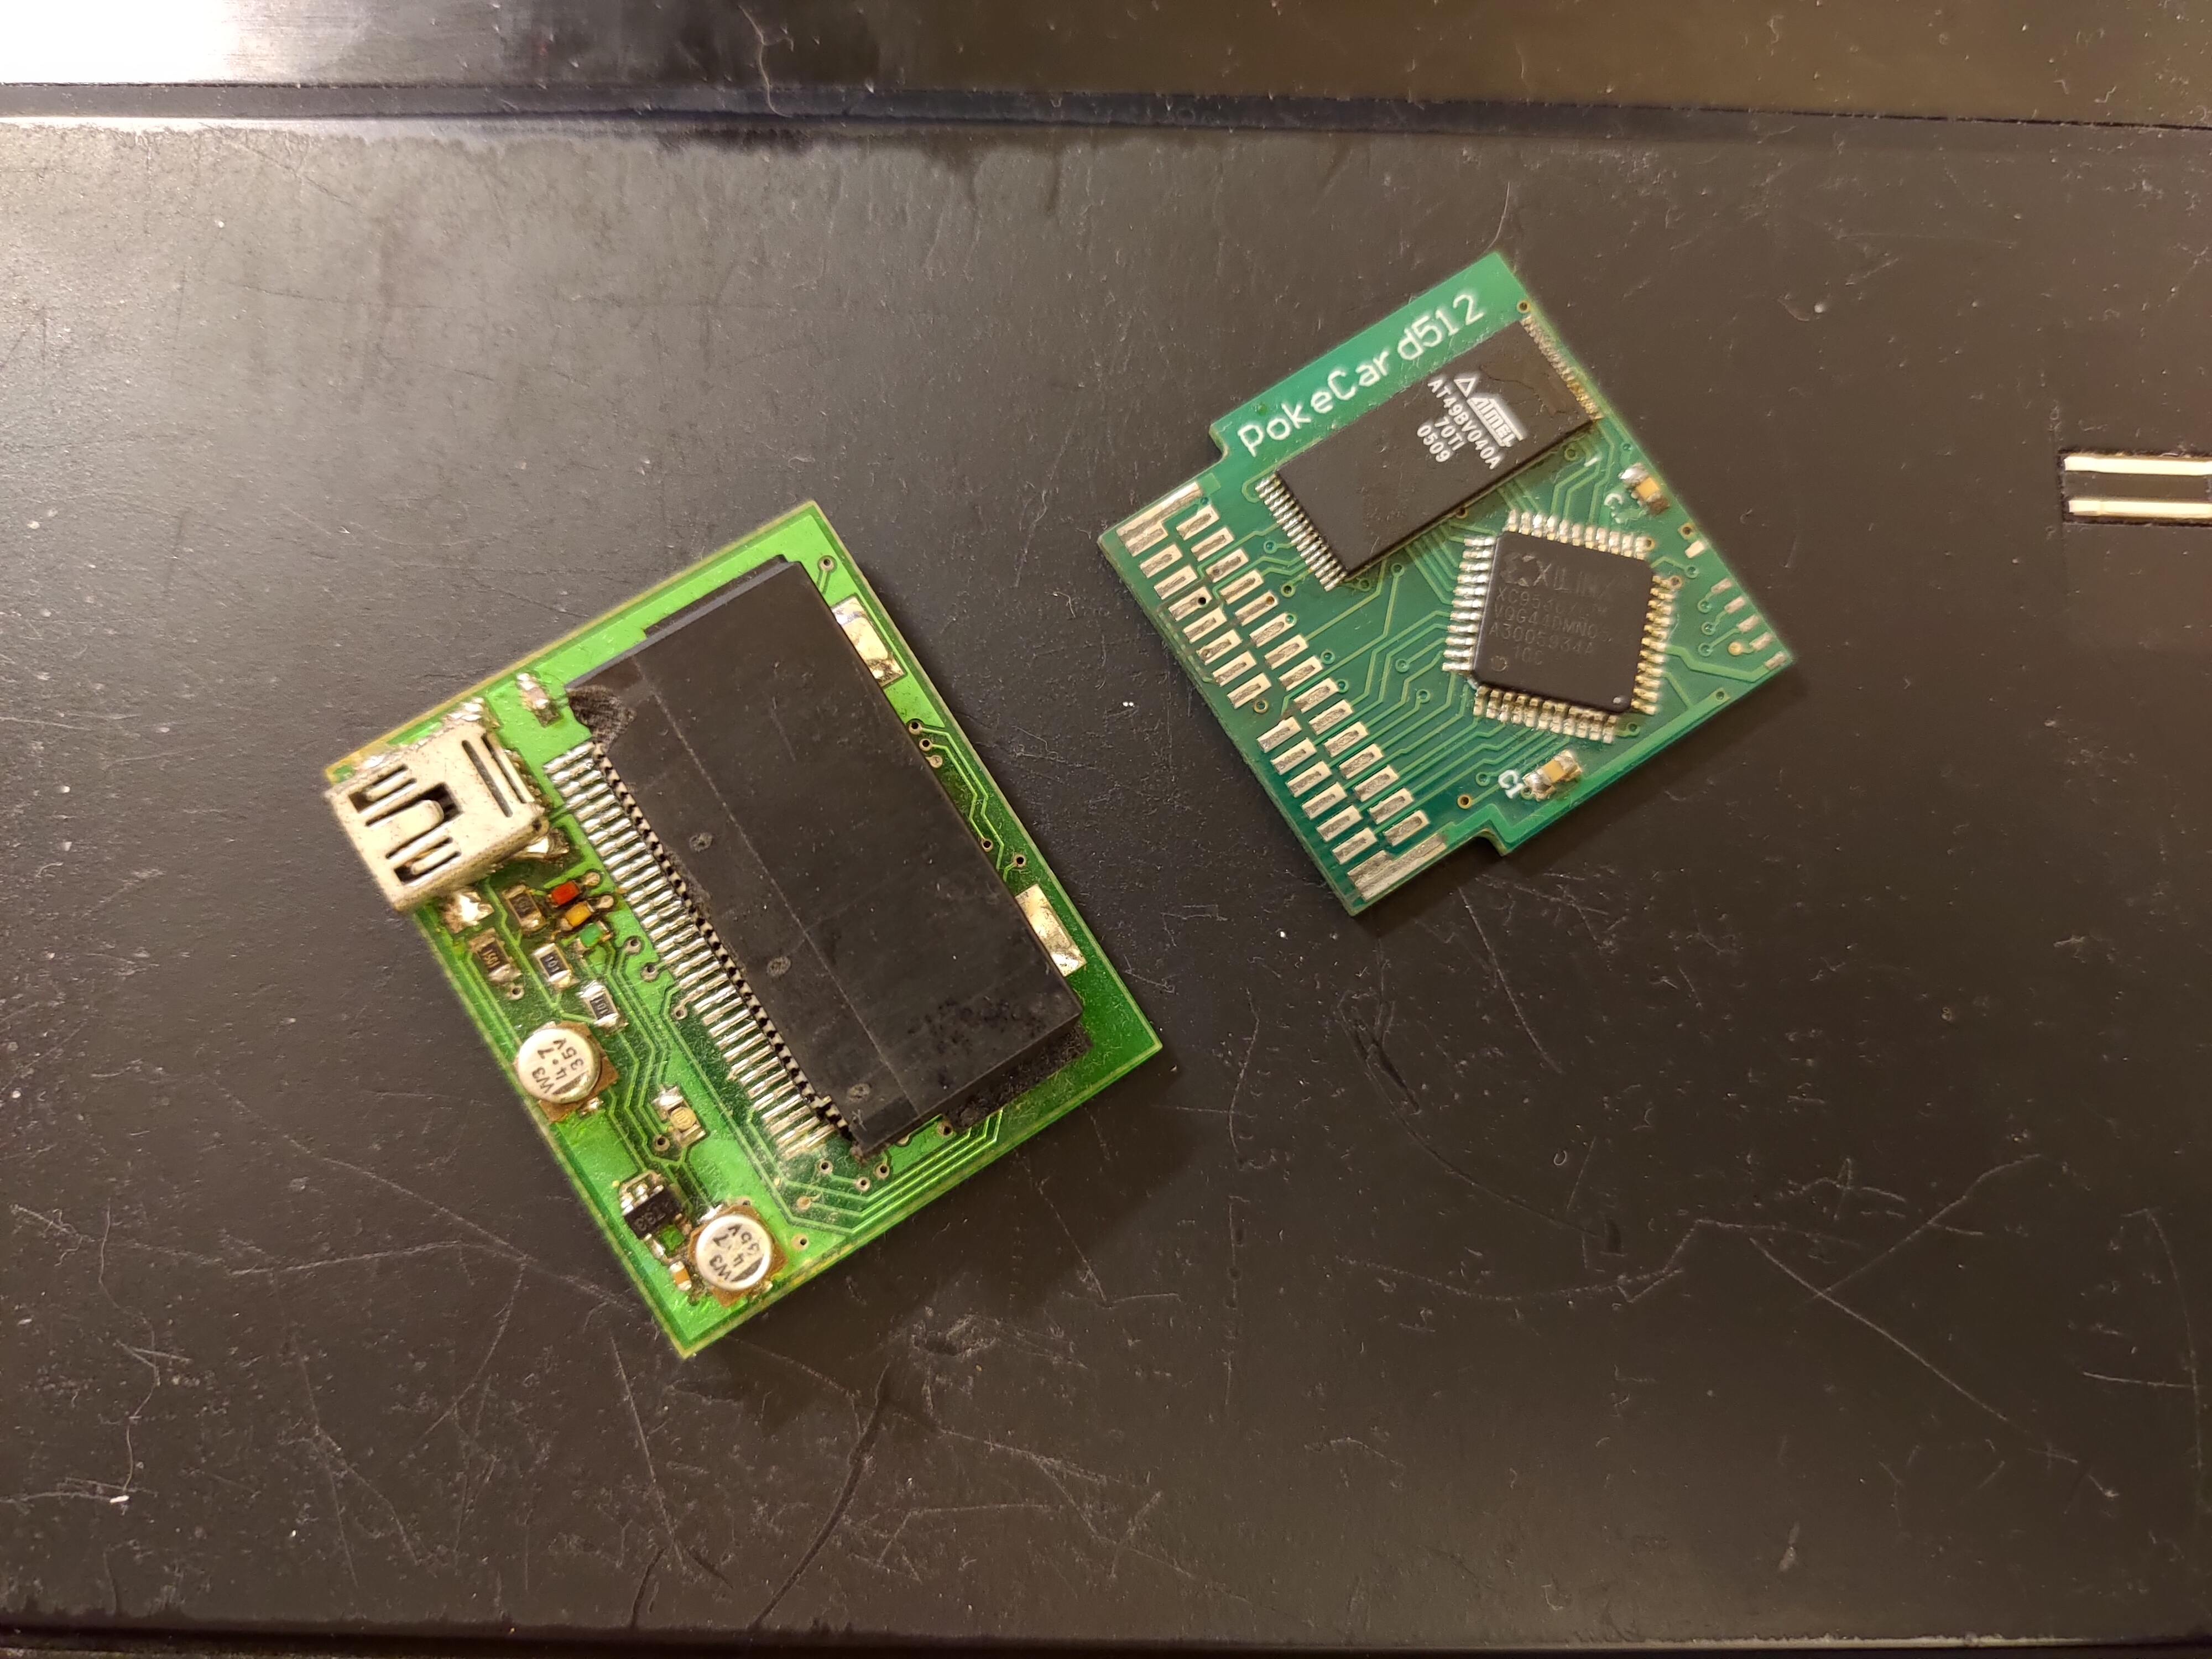
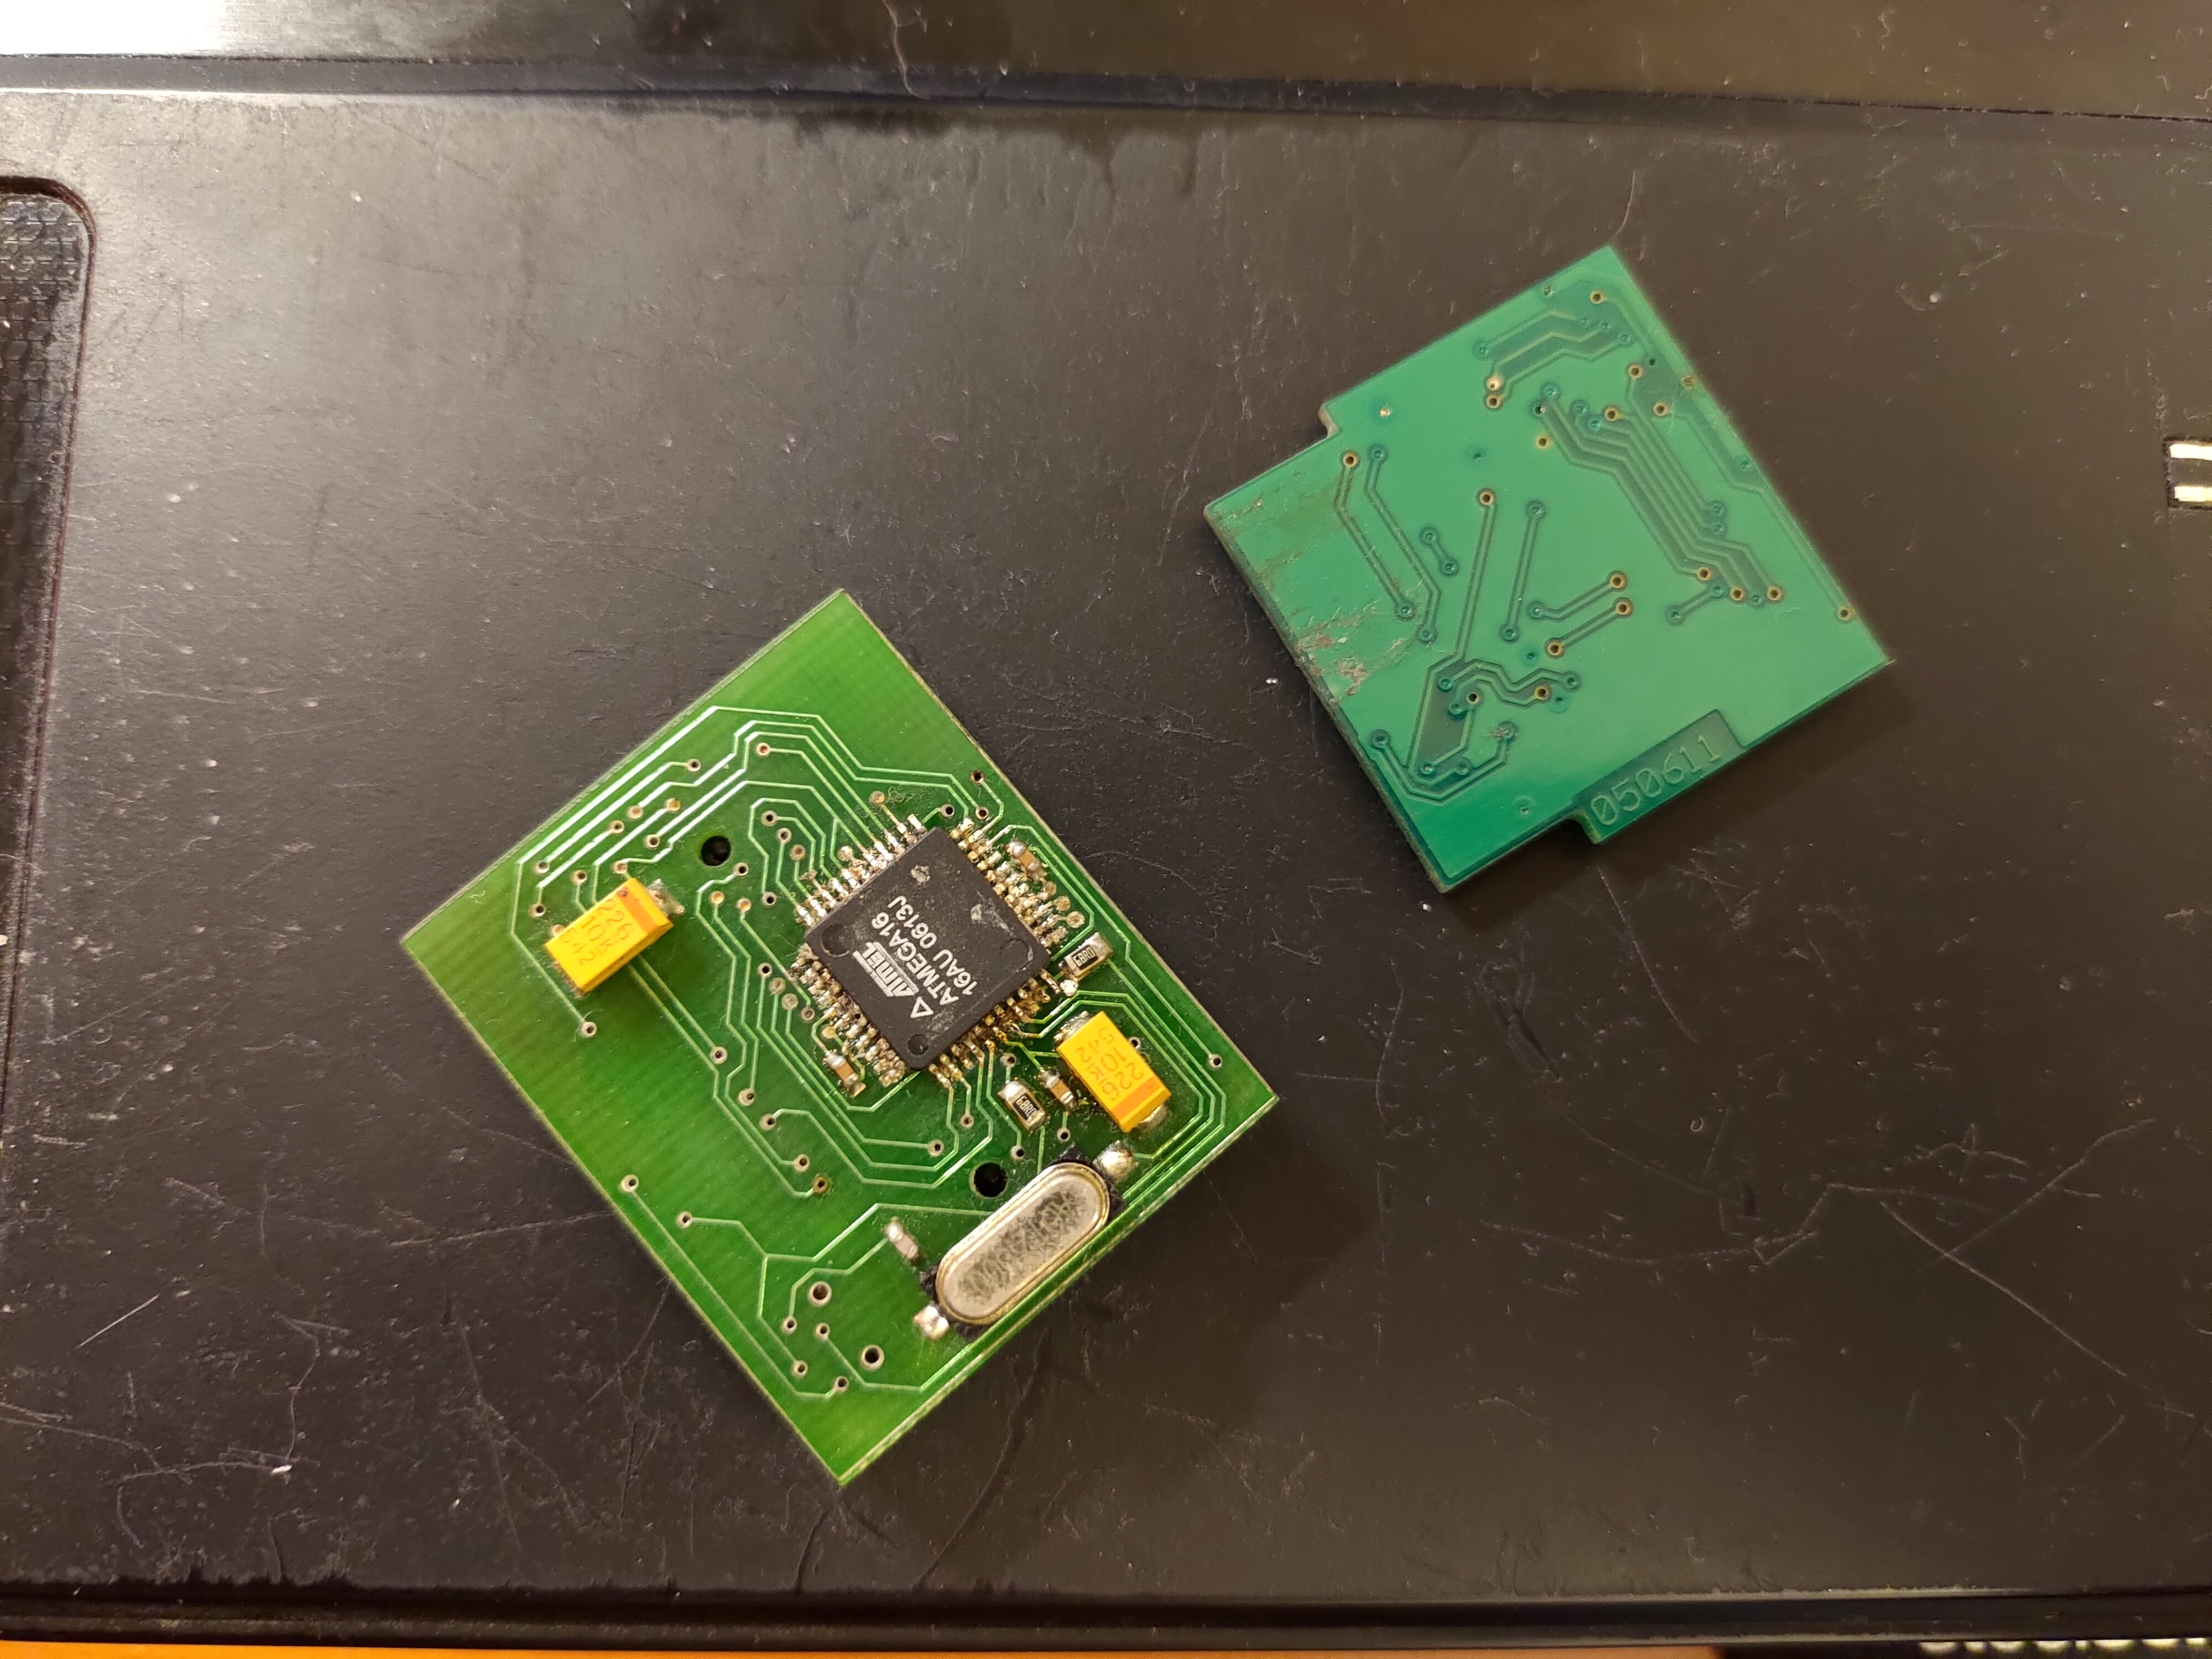
Technical specifications
- Chip: ATMEGA16
- Connector: USB 2.0 Type A
PokeUSB
This flasher requires an official PM cartridge connector, but was sold with them already attached. As such, it’s capable of dumping official cartridges.
Use PokeUSB on Windows XP to flash with this.
Technical specifications
- Chip: ATMEGA162
- Connector: USB 2.0 Type B
Gallery
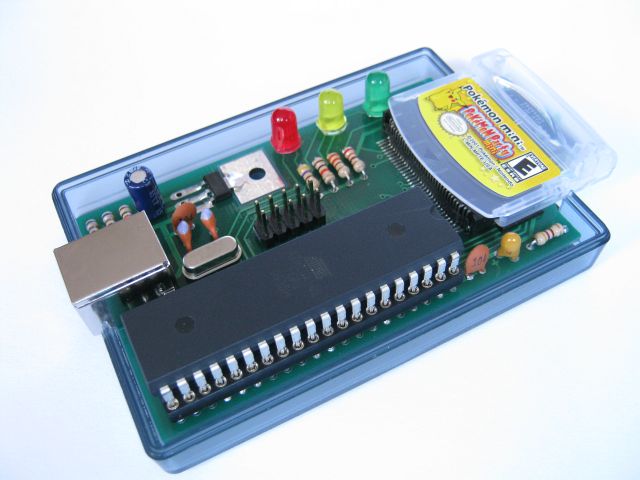
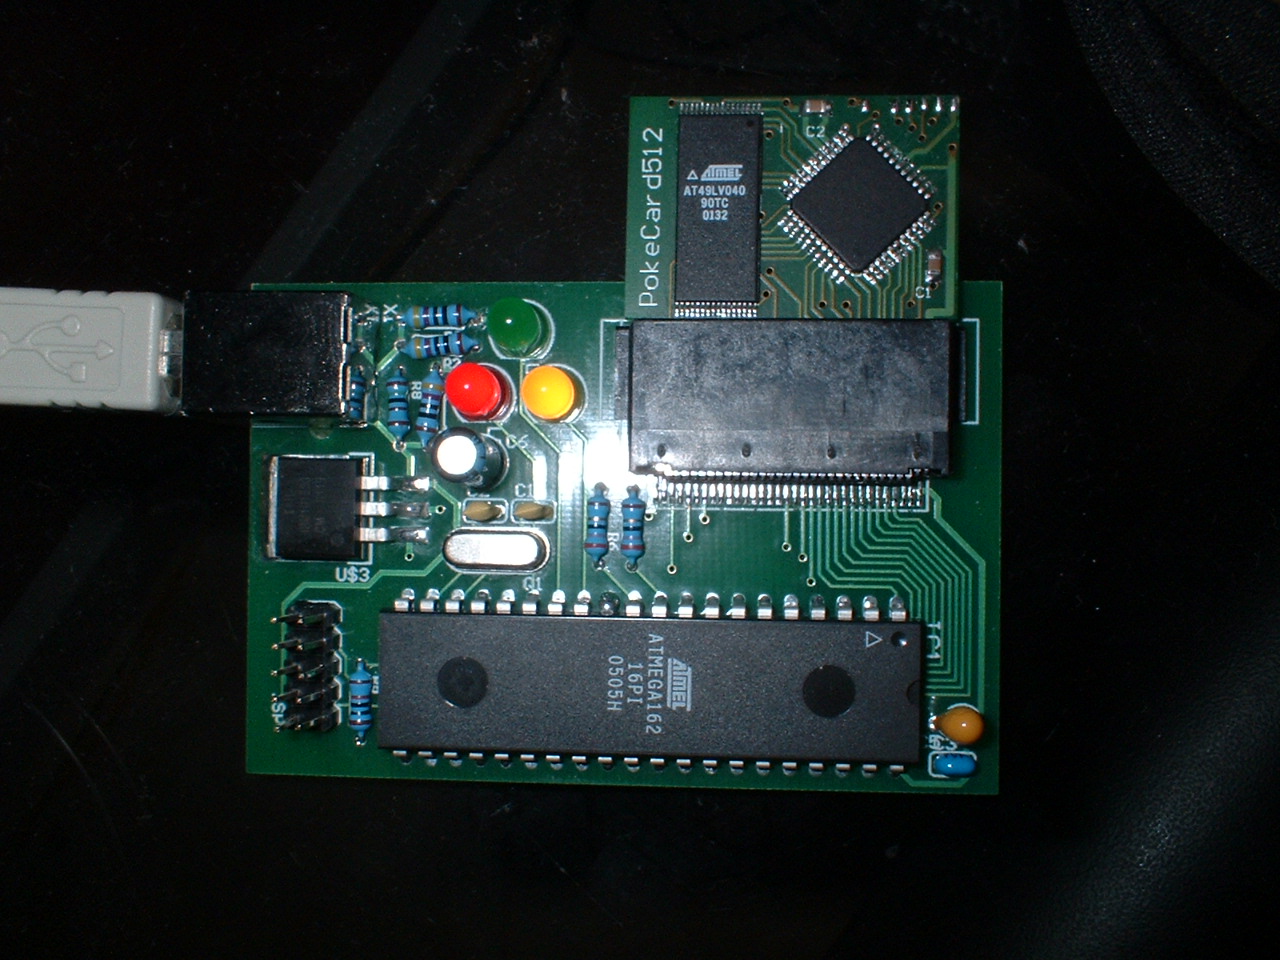
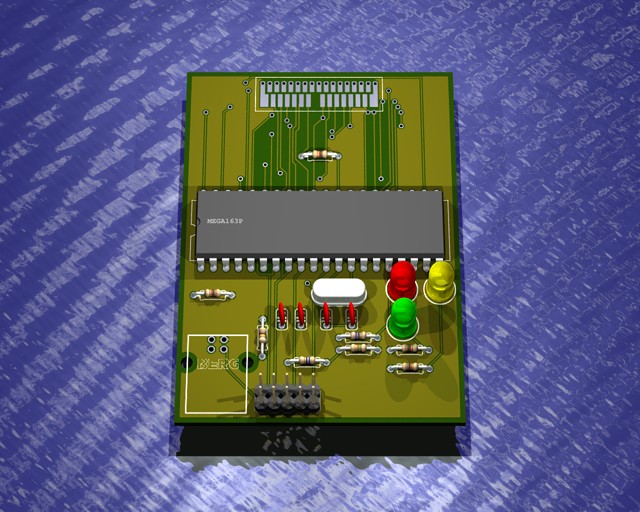
Multicart
Multicart is very simple on PokeCard 512 rev 2+ because the official flashing tool, PokeFlash GUI, can create them for you in the GUI. The bootloader supports up to 17 ROMs.
To do so, open the tool and add all your ROMs from the File menu. Once added, select the ROMs you want to make into a multicart (you can Ctrl+Click to select multiple) and add them to the ROM sets section by clicking the Add >> button. You must select at least two or it will not make a multicart. Now connect you PokeCard if you haven’t already and click Flash ROM set once it’s ready. Remember it can’t fit more than one commercial game, so you can only put (small) homebrew in the ROM set!
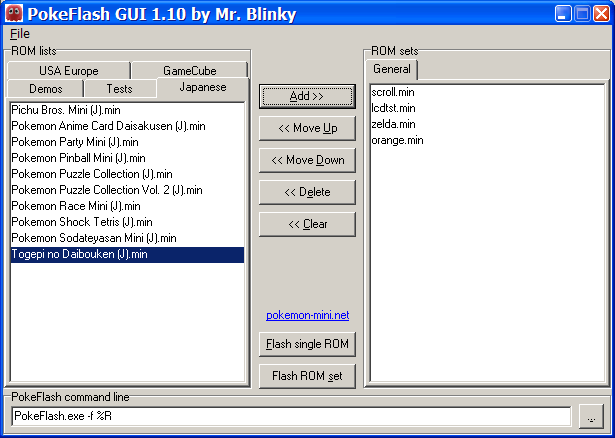
To get multiple tabs like this, you’ll have to edit PokeFlashGUI.ini manually. Simply increase the value of RomTabs and/or FlashTabs (ROM sets) under [Config] and the next time you open and close the tool it will create the necessary configs for you. You can change the Title under the tab config to change the names like in the image above.
Backup Save tool
To use the Backup Save tool, create a multicart. On the multicart menu, press the B button to open the Backup Save tool.
On this menu you can select a save slot to back up and press A to do so.
Pressing B again cycles through the other backup tools: Restore Save, Delete Save, then back to the Select Game menu.
To back up the save to your computer, you’ll need to use the command-line version of PokeFlash. Open a terminal to the location where PokeFlash.exe is and run ./PokeFlash.exe -d backup.min which will dump it to backup.min. You can then technically extract the save information, but it’s beyond the scope of this document to explain that in detail.
Save backup format
The location where save backups are saved depends on how many games are on the cart.
| Offset | Size | Descrtipion |
|---|---|---|
| $00 | 4 | Magic bytes: SGMN |
| $04 | 3 | Time from seconds timer |
| $07 | 14 | Defaults and time from EEPROM |
| $15 | 1 | EEPROM save slot number |
| $16 | 18 | EEPROM slot’s header |
| $28 | 1280 | EEPROM slot’s data |
BIOS backup tool
To use the Backup Save tool, create a multicart. On the multicart menu, press the B button to open the Backup Save tool then press the C button to enter the Flash Info screen. On here, press A to backup the BIOS to the cart.
To back up the save to your computer, you’ll need to use the command-line version of PokeFlash. Open a terminal to the location where PokeFlash.exe is and run ./PokeFlash.exe -d backup.min which will dump it to backup.min. The BIOS will have been saved to $000000 and is $1000 bytes long, you can open the backup in a hex editor such as HxD and extract the BIOS from here.
Writing from software
The PokeCard 512 rev 2+ offers full flash control from software. So any command - such as writing, erasing, getting manufacturer information, etc. - can be run from software.
Since flashing data to the cartridge requires entering command sequences which would be interrupted by reads, any functions which write to the cart must be run from RAM with interrupts masked (LD SC, #0C0h).
There are two registers the PokeCard offers:
#define FLASH_ADDR1 (*((volatile uint8_t _far *)0x080AAA))
#define FLASH_ADDR2 (*((volatile uint8_t _far *)0x080555))
In order to flash a single byte, perform the following sequence:
// rev 2 (which has a scrambled data bus)
FLASH_ADDR1 = 0x99;
FLASH_ADDR2 = 0x66;
FLASH_ADDR1 = 0x44;

// rev 2.1
FLASH_ADDR1 = 0x55;
FLASH_ADDR2 = 0xAA;
FLASH_ADDR1 = 0xA0;

// both, no need to scramble for the value in rev 2??
*((volatile uint8_t _far *)address) = value;
// wait ~32 more cycles, such as with _nop()s or a DJR loop
Bank switching
Because bank switching changes where the CPU reads from immediately, it’s recommended to switch from code running in RAM. If this is for a multicart, you can call _int(0x02) after to reset the console and load software from the new slot.
#define FLASH_ADDR2 (*((volatile uint8_t _far *)0x080555))
#define BANK_SWITCH (*((volatile uint8_t _far *)0x07FFFF))

// Unconfirmed but was in the notes, no mention of rev 2 tho
static inline void bank_reset(char rev2) {
	// Resets bank offset to $000000
	FLASH_ADDR2 = rev2 ? 0x41 | 0x90;
}

// Select an 8K bank
BANK_SWITCH = 0x00; // select bank  0 ($000000)
BANK_SWITCH = 0x01; // select bank  1 ($002000)
BANK_SWITCH = 0x02; // select bank  2 ($004000)
// ...
BANK_SWITCH = 0x3F; // select bank 63 ($07E000)

// The source for the multirom mentions this calculation
// for the bank offset, but it doesn't seem to be how
// PokeFlash assembles the ROM? not sure what it's about
offset = ((bank ^ 4) & 7) * 0x010000 + (bank & 0x38) * 0x0400;